What is bleed?
Bleed is the area outside of your finished design that is used to trim artwork to the correct size. Without adding bleed to your artwork, we need to trim into the artwork and so the finished size will be smaller than expected.
Bleed is the function that allows for Edge to Edge printing. Without bleed, we need to either cut into your artwork or leave a white border around the outside edge. This can look unsightly or can cut critical and required information from the design. If you have ever seen a flyer or poster that looks like it has been trimmed badly with text too close to the edge. The chances are this artwork was supplied without bleed or consideration for margins.
How much bleed do I need?
As sheets move when printed, we do request a minimum of 3mm bleed on all small format and large format prints. This is with the exception of Roller banners. Roller banners should have 3mm bleed all round except the bottom where it needs a 100mm bleed to allow for fitting to the mechanism.
What is margin?
Margin is the space between the finished size of your document and any important elements contained in the design. We refer as margin as the “safe zone” that ensures none of the critical elements are cut off when trimming the document. We always recommend a minimum of 3mm margin on all print files.
Why we need bleed
In the image above the DOTTED black line outlines the finished size of the business card & the DARK grey area outside this indicated the bleed required to allow us to trim the business card to the desired size. Within the boundary of the design, you’ll also see a LIGHT grey area which is the margin or safe area. Like bleed we recommend a minimum of 3mm in the margin to ensure critical content is not trimmed by our production team when guillotining your business cards.
How to add bleed in Adobe Indesign
We’ve put together a short video outlining the need for bleed and how to add bleed to your Adobe InDesign document. This will be available very soon on this very page.
Bleed guidelines
The success of a print project depends on many factors but one of the most important is the inclusion of bleed to your design. From the largest banner to the smallest flyer, bleed is critical to ensuring the final print is completed as expected. For all printing undertaken here at Kaizen Print, we request a 3mm bleed on all sides of your print. This is with the exception of roller banners which require 3mm bleed on the top, left and right hand sides, but 100mm on the bottom of the banner. This ensures that the graphic continues into the mechanism and that no unsightly white border is left on the print.
The 3 steps to adding bleed to a new document in Adobe InDesign are:
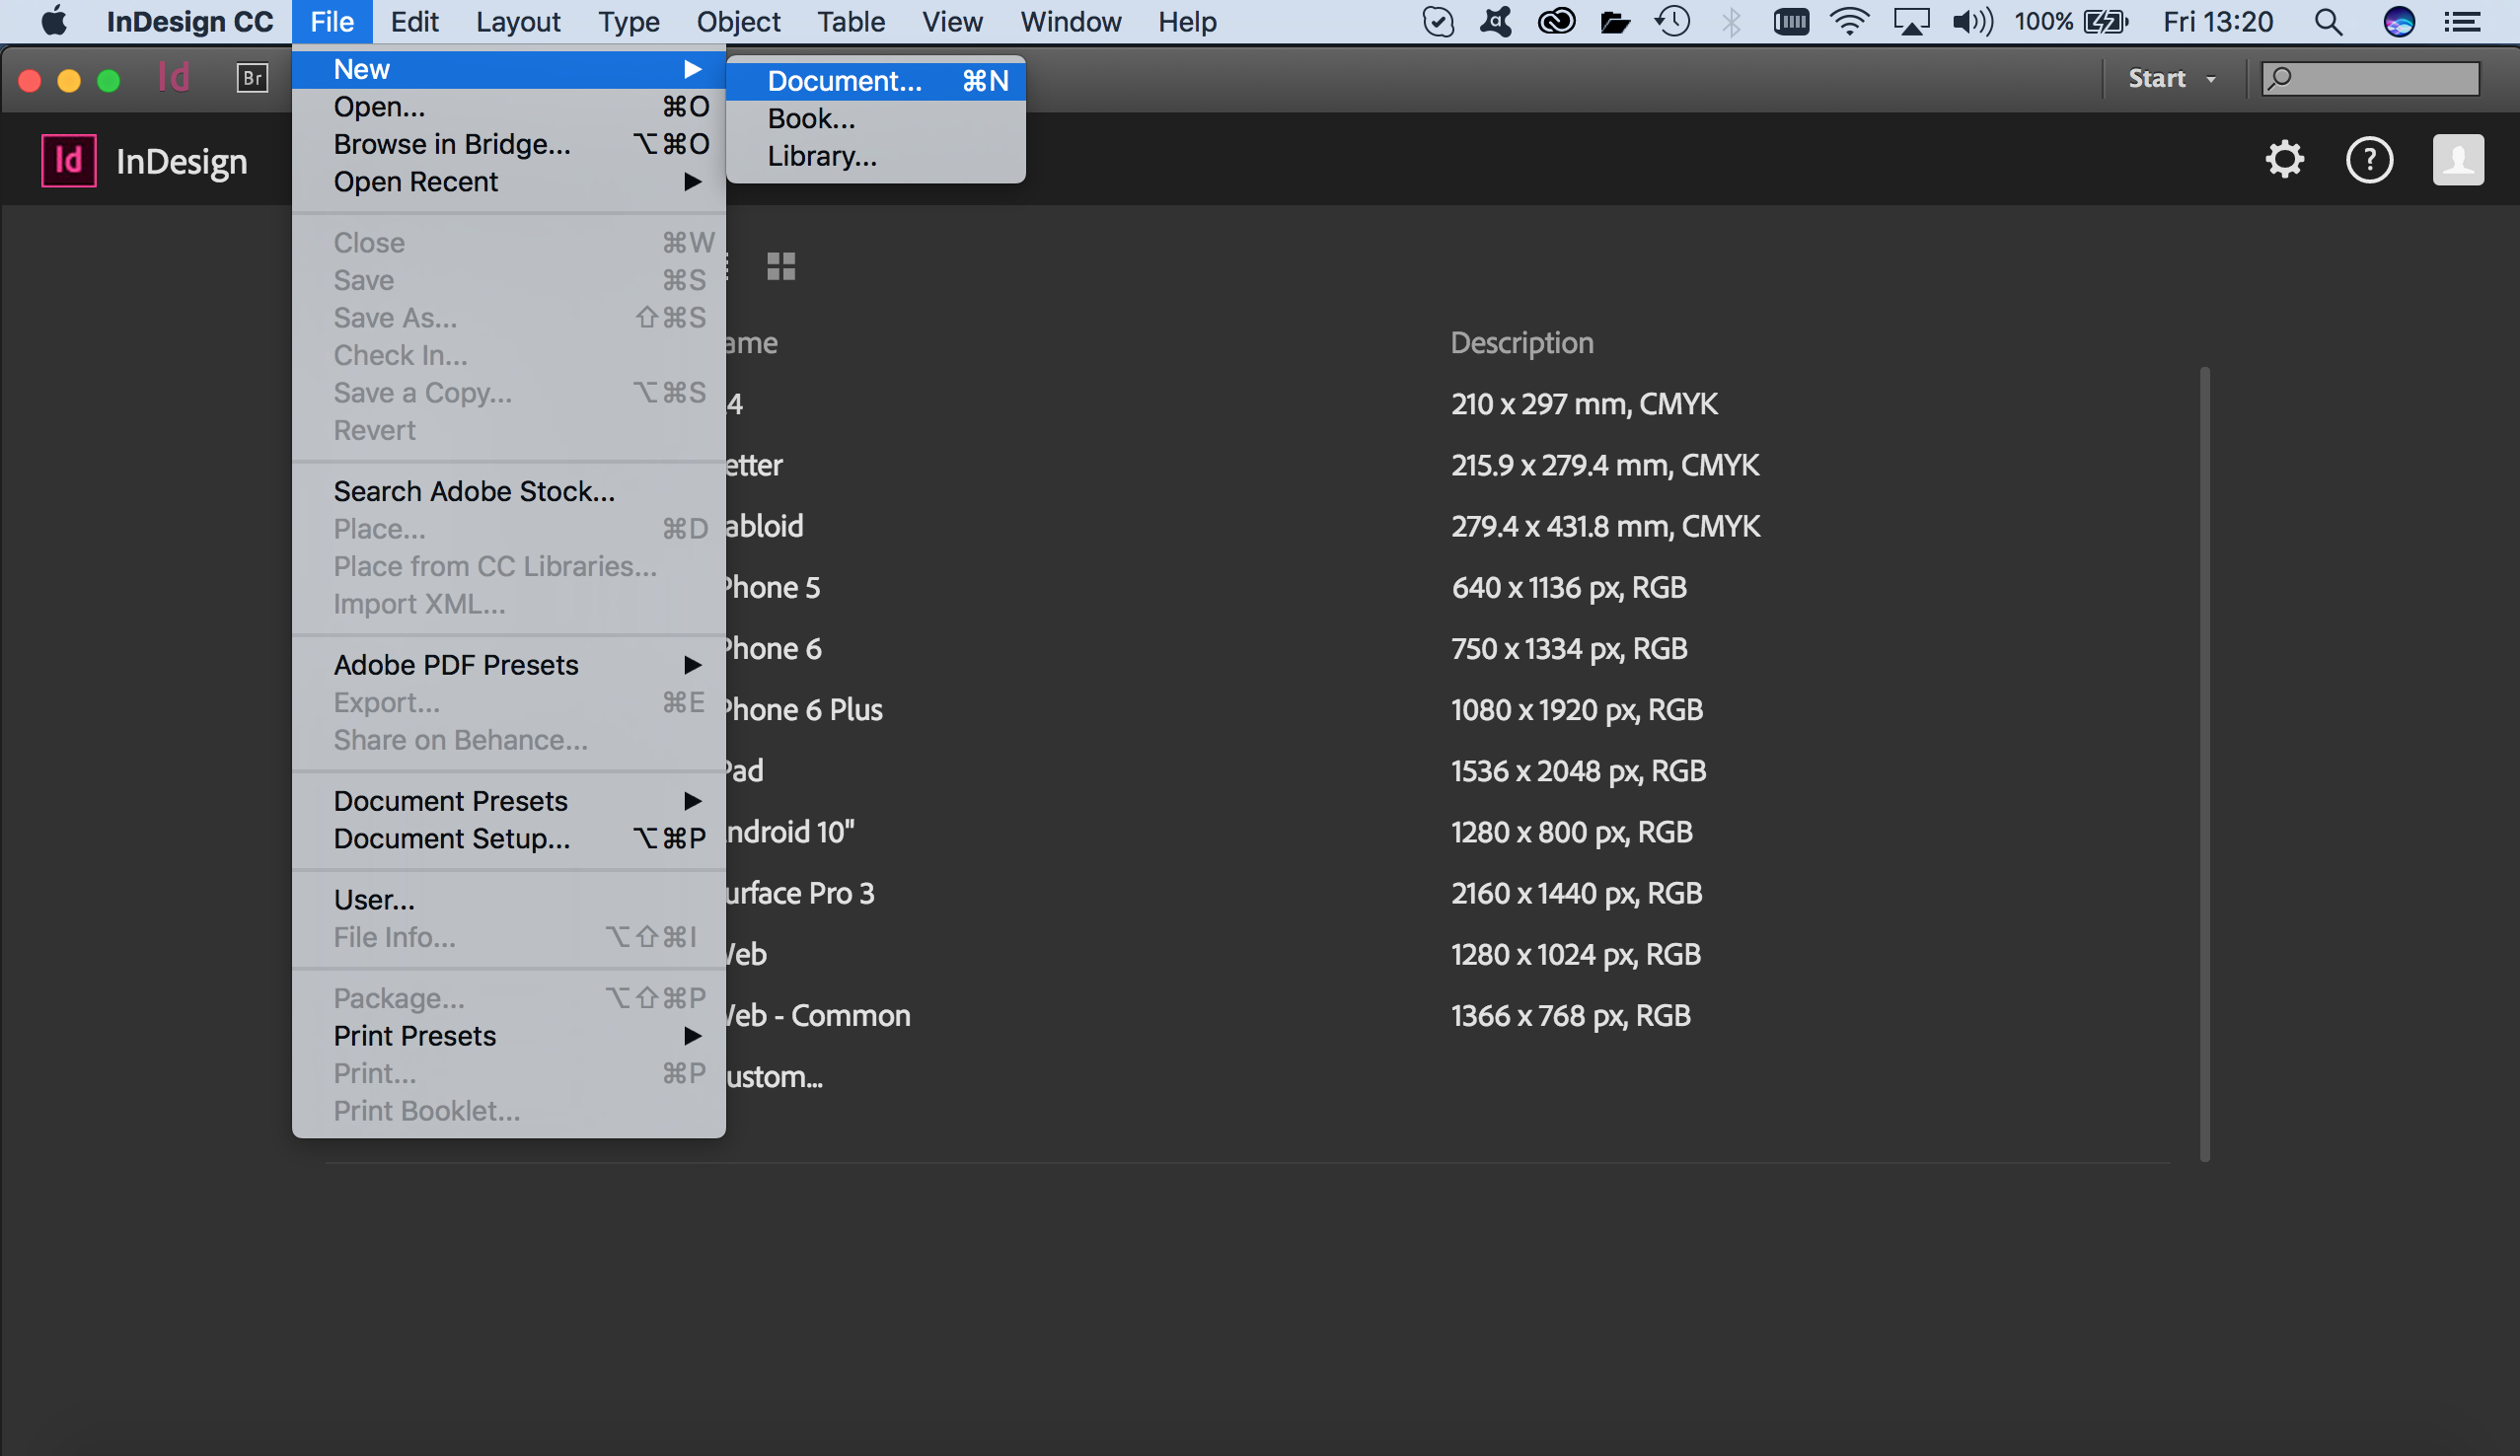
- With InDesign open, click on File and then New Document
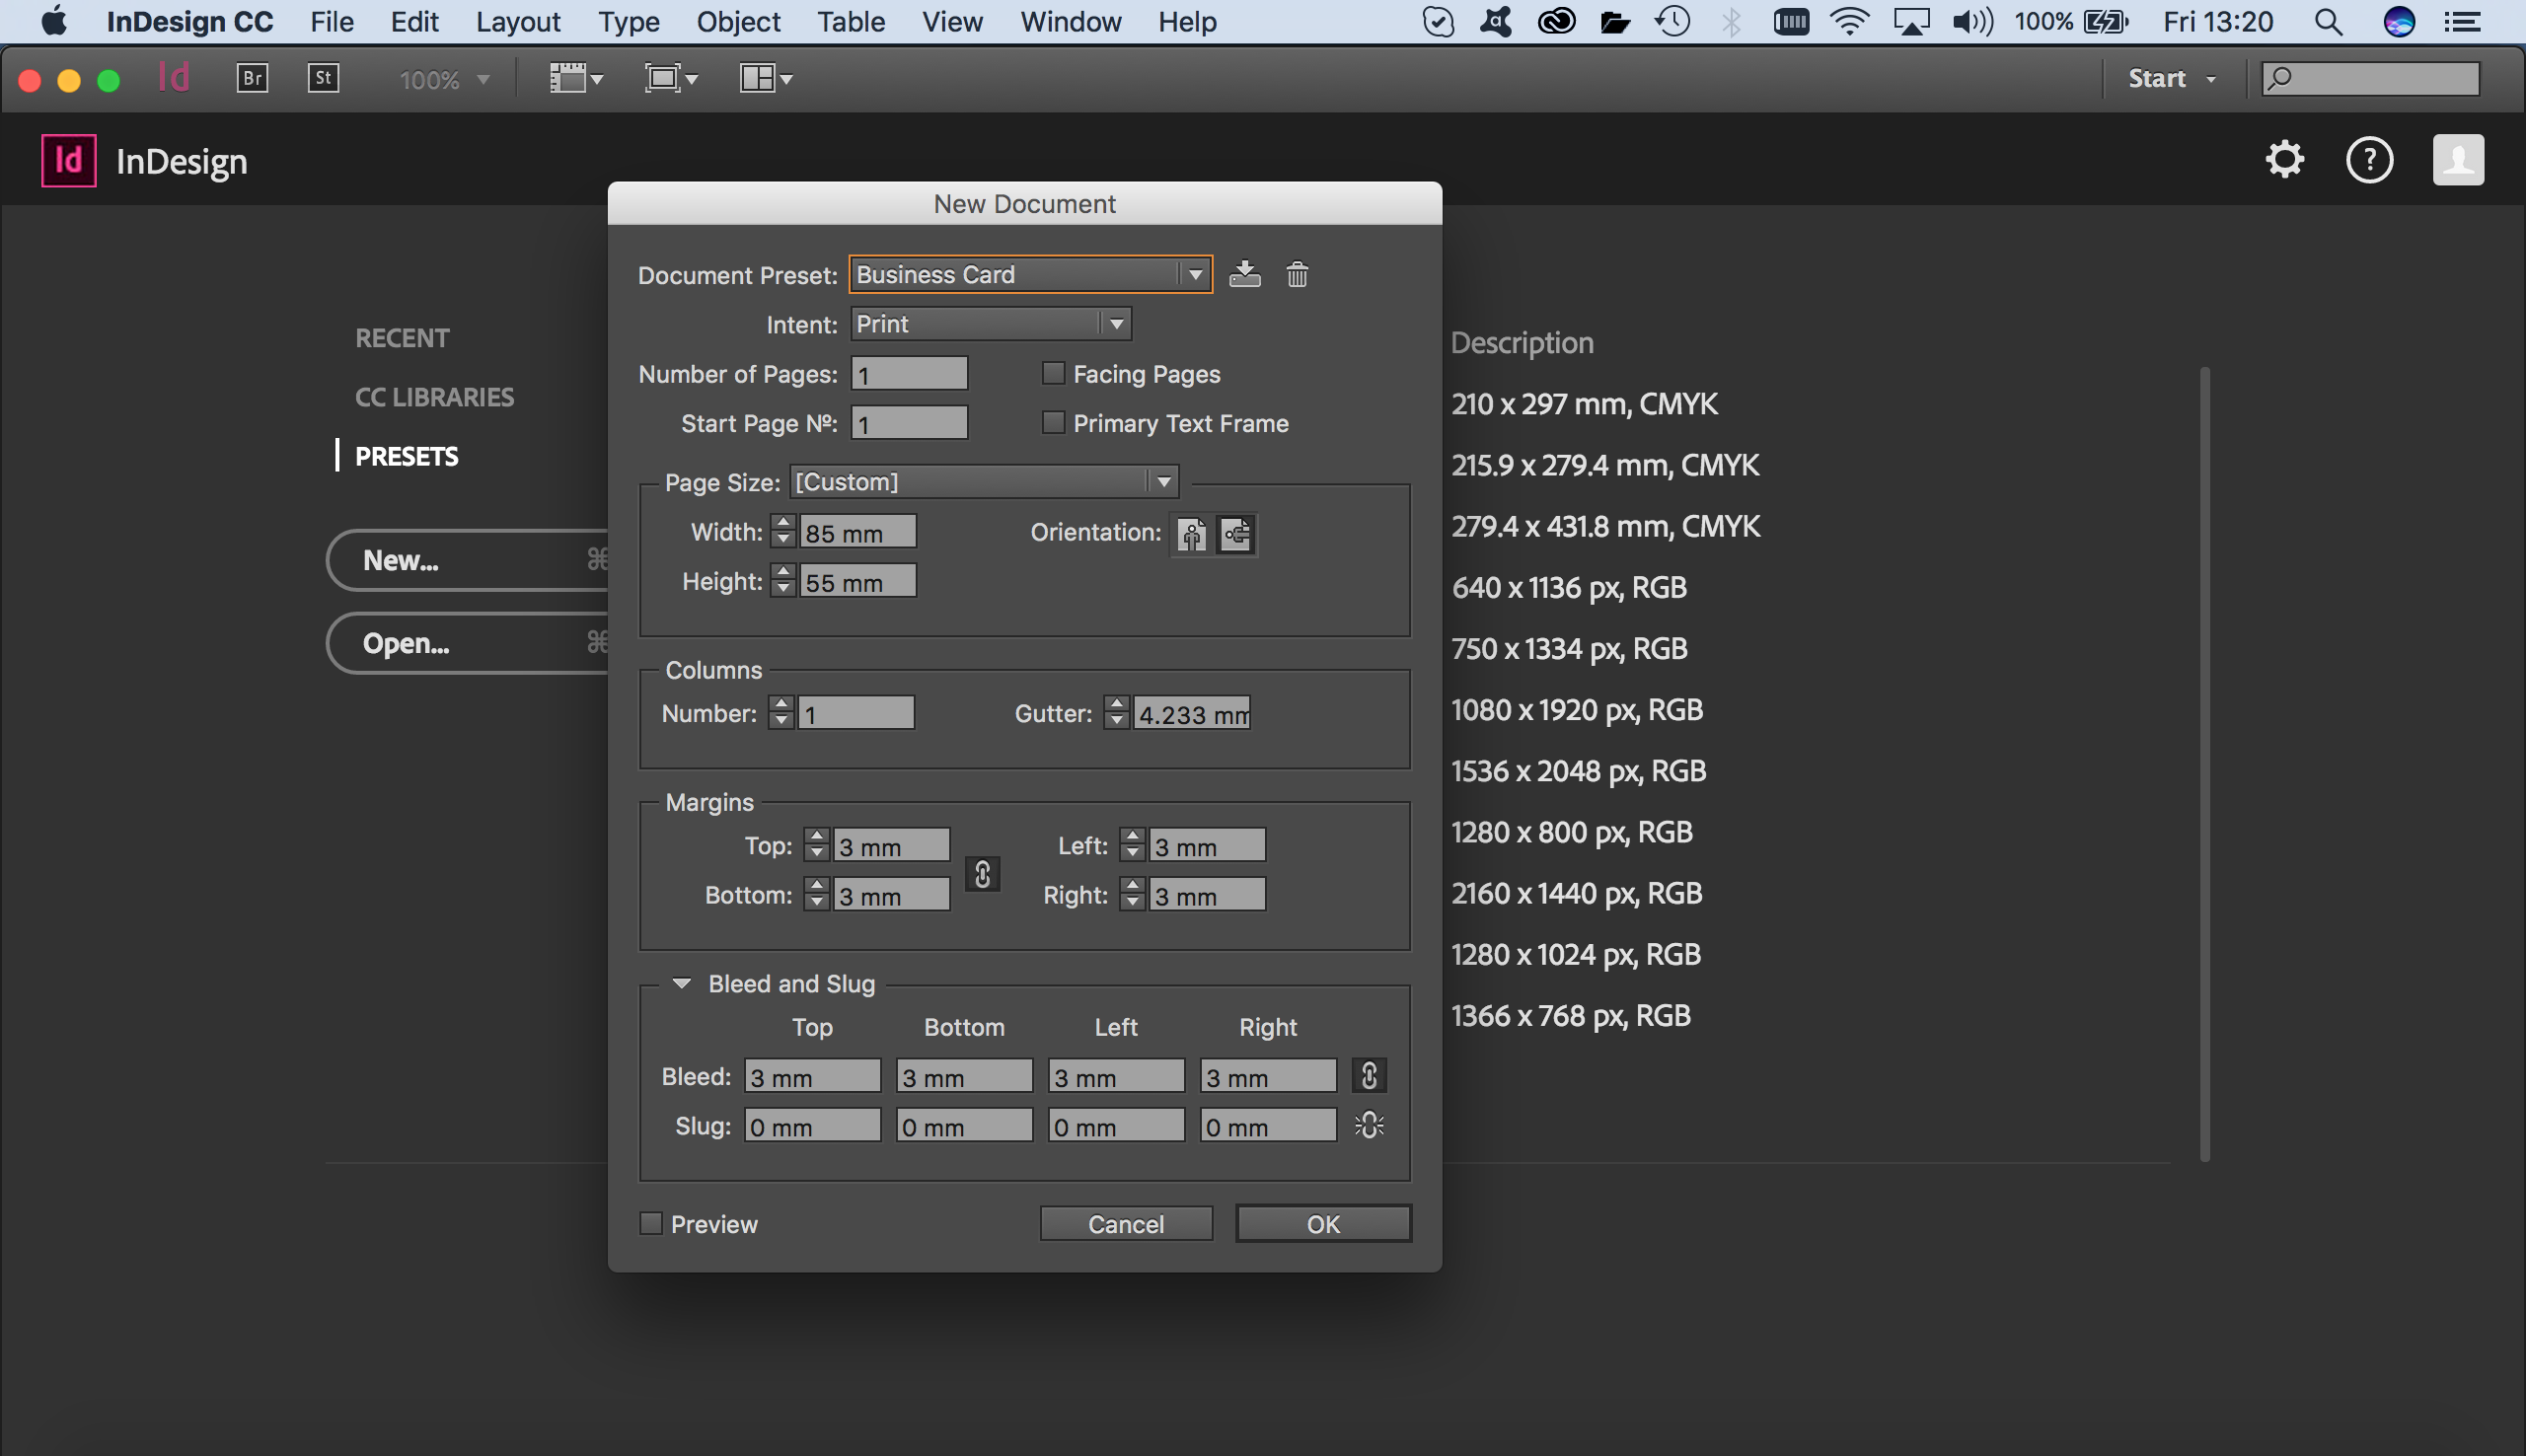
- In the New Document pop up, set your page size to the finished size of the document. The margin and bleed should be set to 3mm. If you click on the link icon, this is a nice way of populating all fields at one time.
- Click ok and your artboard with bleed and margin is ready to use.

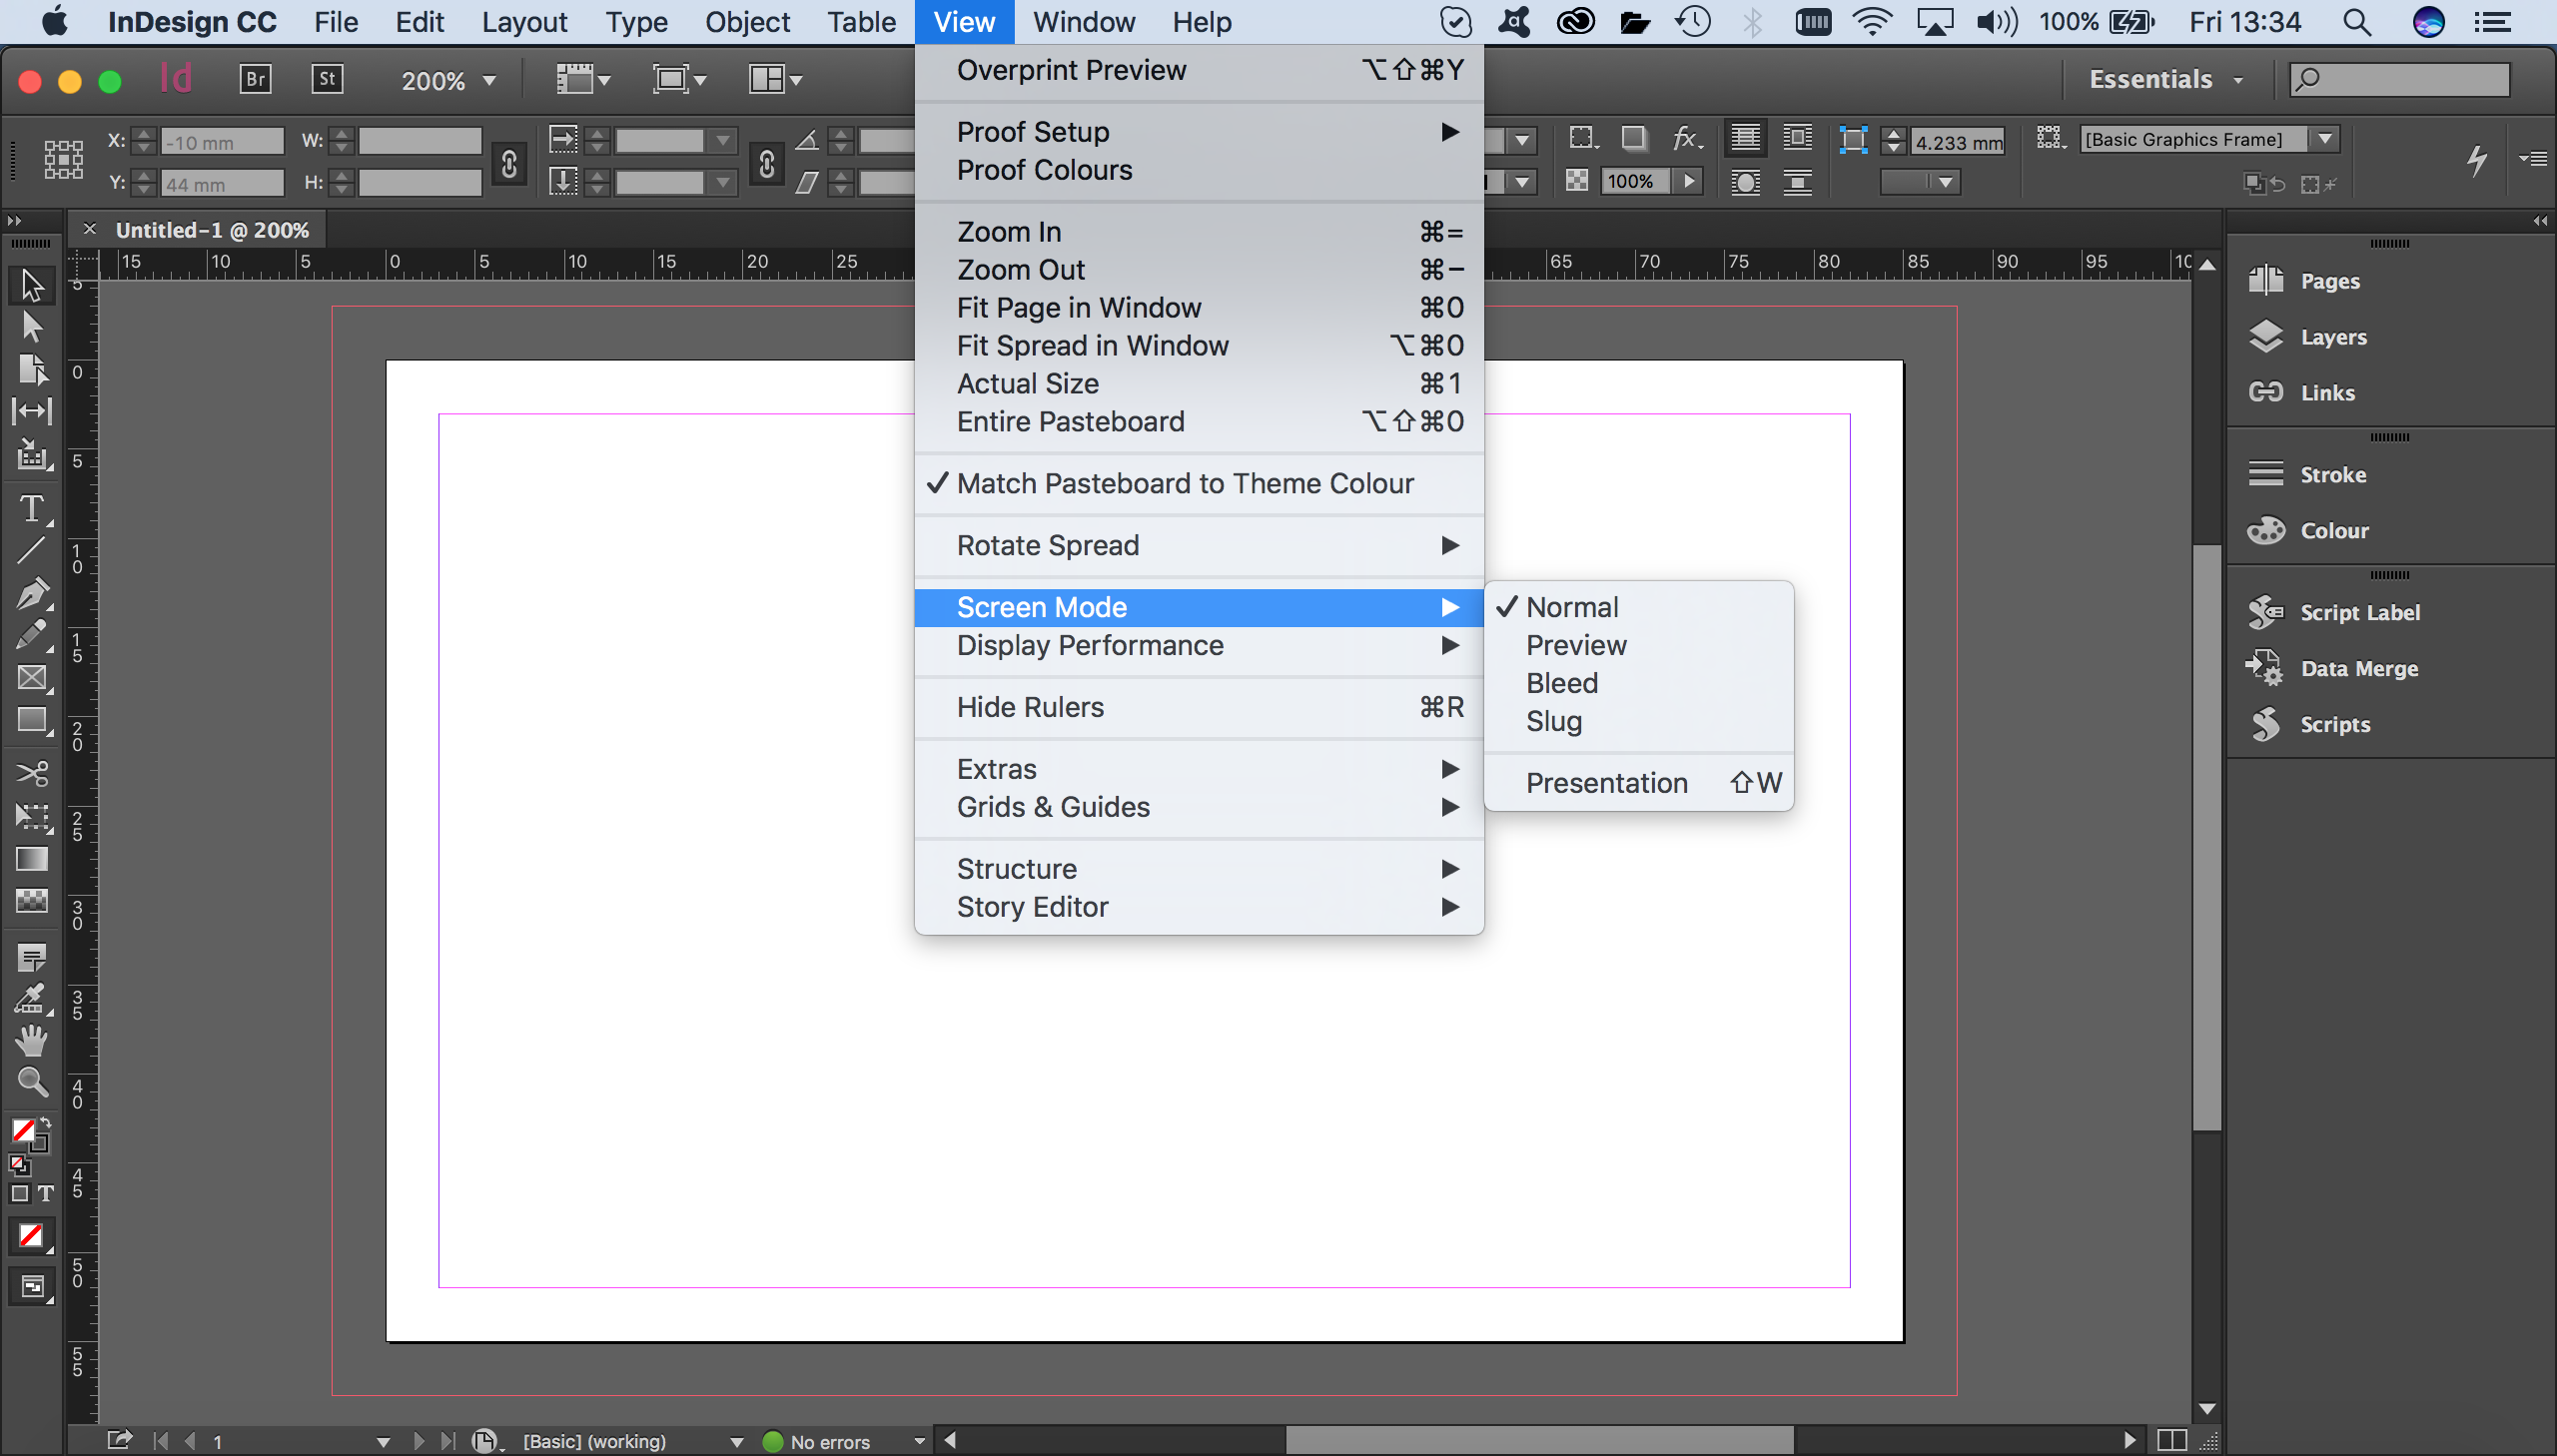
Within your InDesign document as shown above, the red outer line is the bleed, the black line around the document will be the edge of your print and the inner pink/purple line is the margin. To check your artwork and the bleed on the document click on View and then Screen Mode from the options bar. The different view options will allow you to see the finished document with and without bleed.
Exporting a PDF from Adobe InDesign with bleed
Setting up your document with bleed won’t guarantee that it is exported with bleed. When exporting your document as a pdf you need to check that certain settings are selected. It’s very easy to miss, but the photos below explain this perfectly.
The 3 steps to exporting a PDF from Adobe InDesign with bleed are:
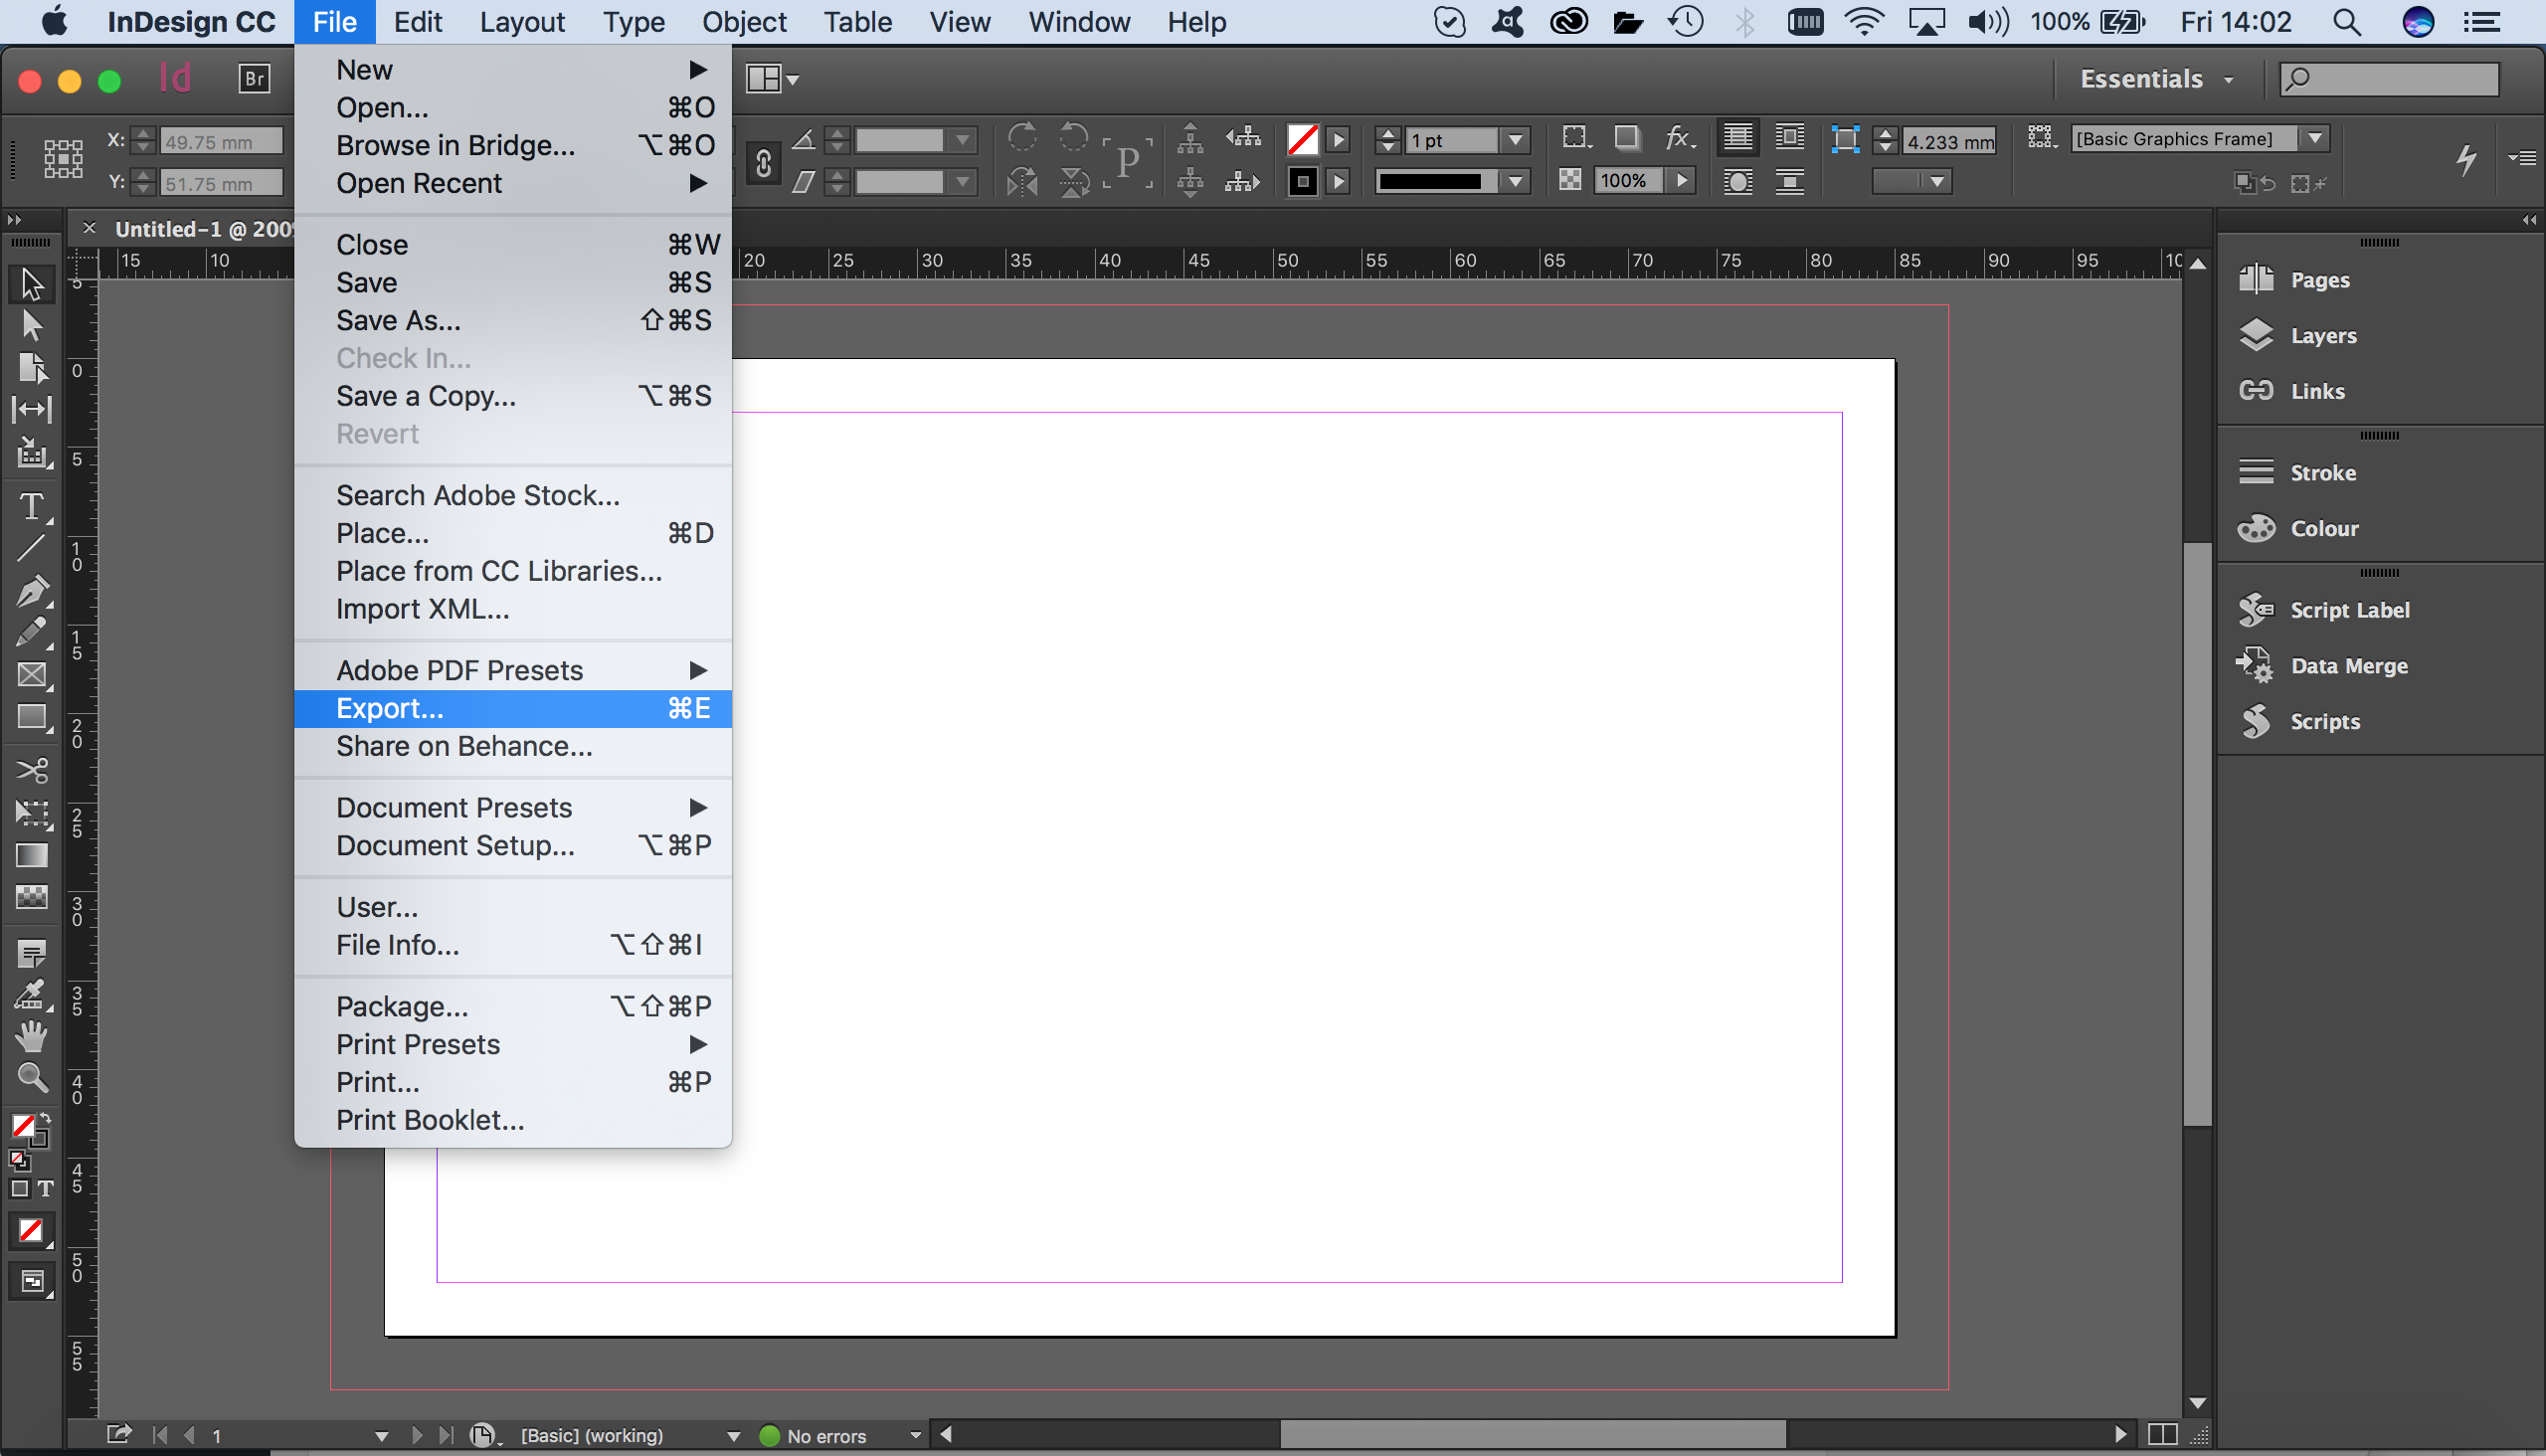
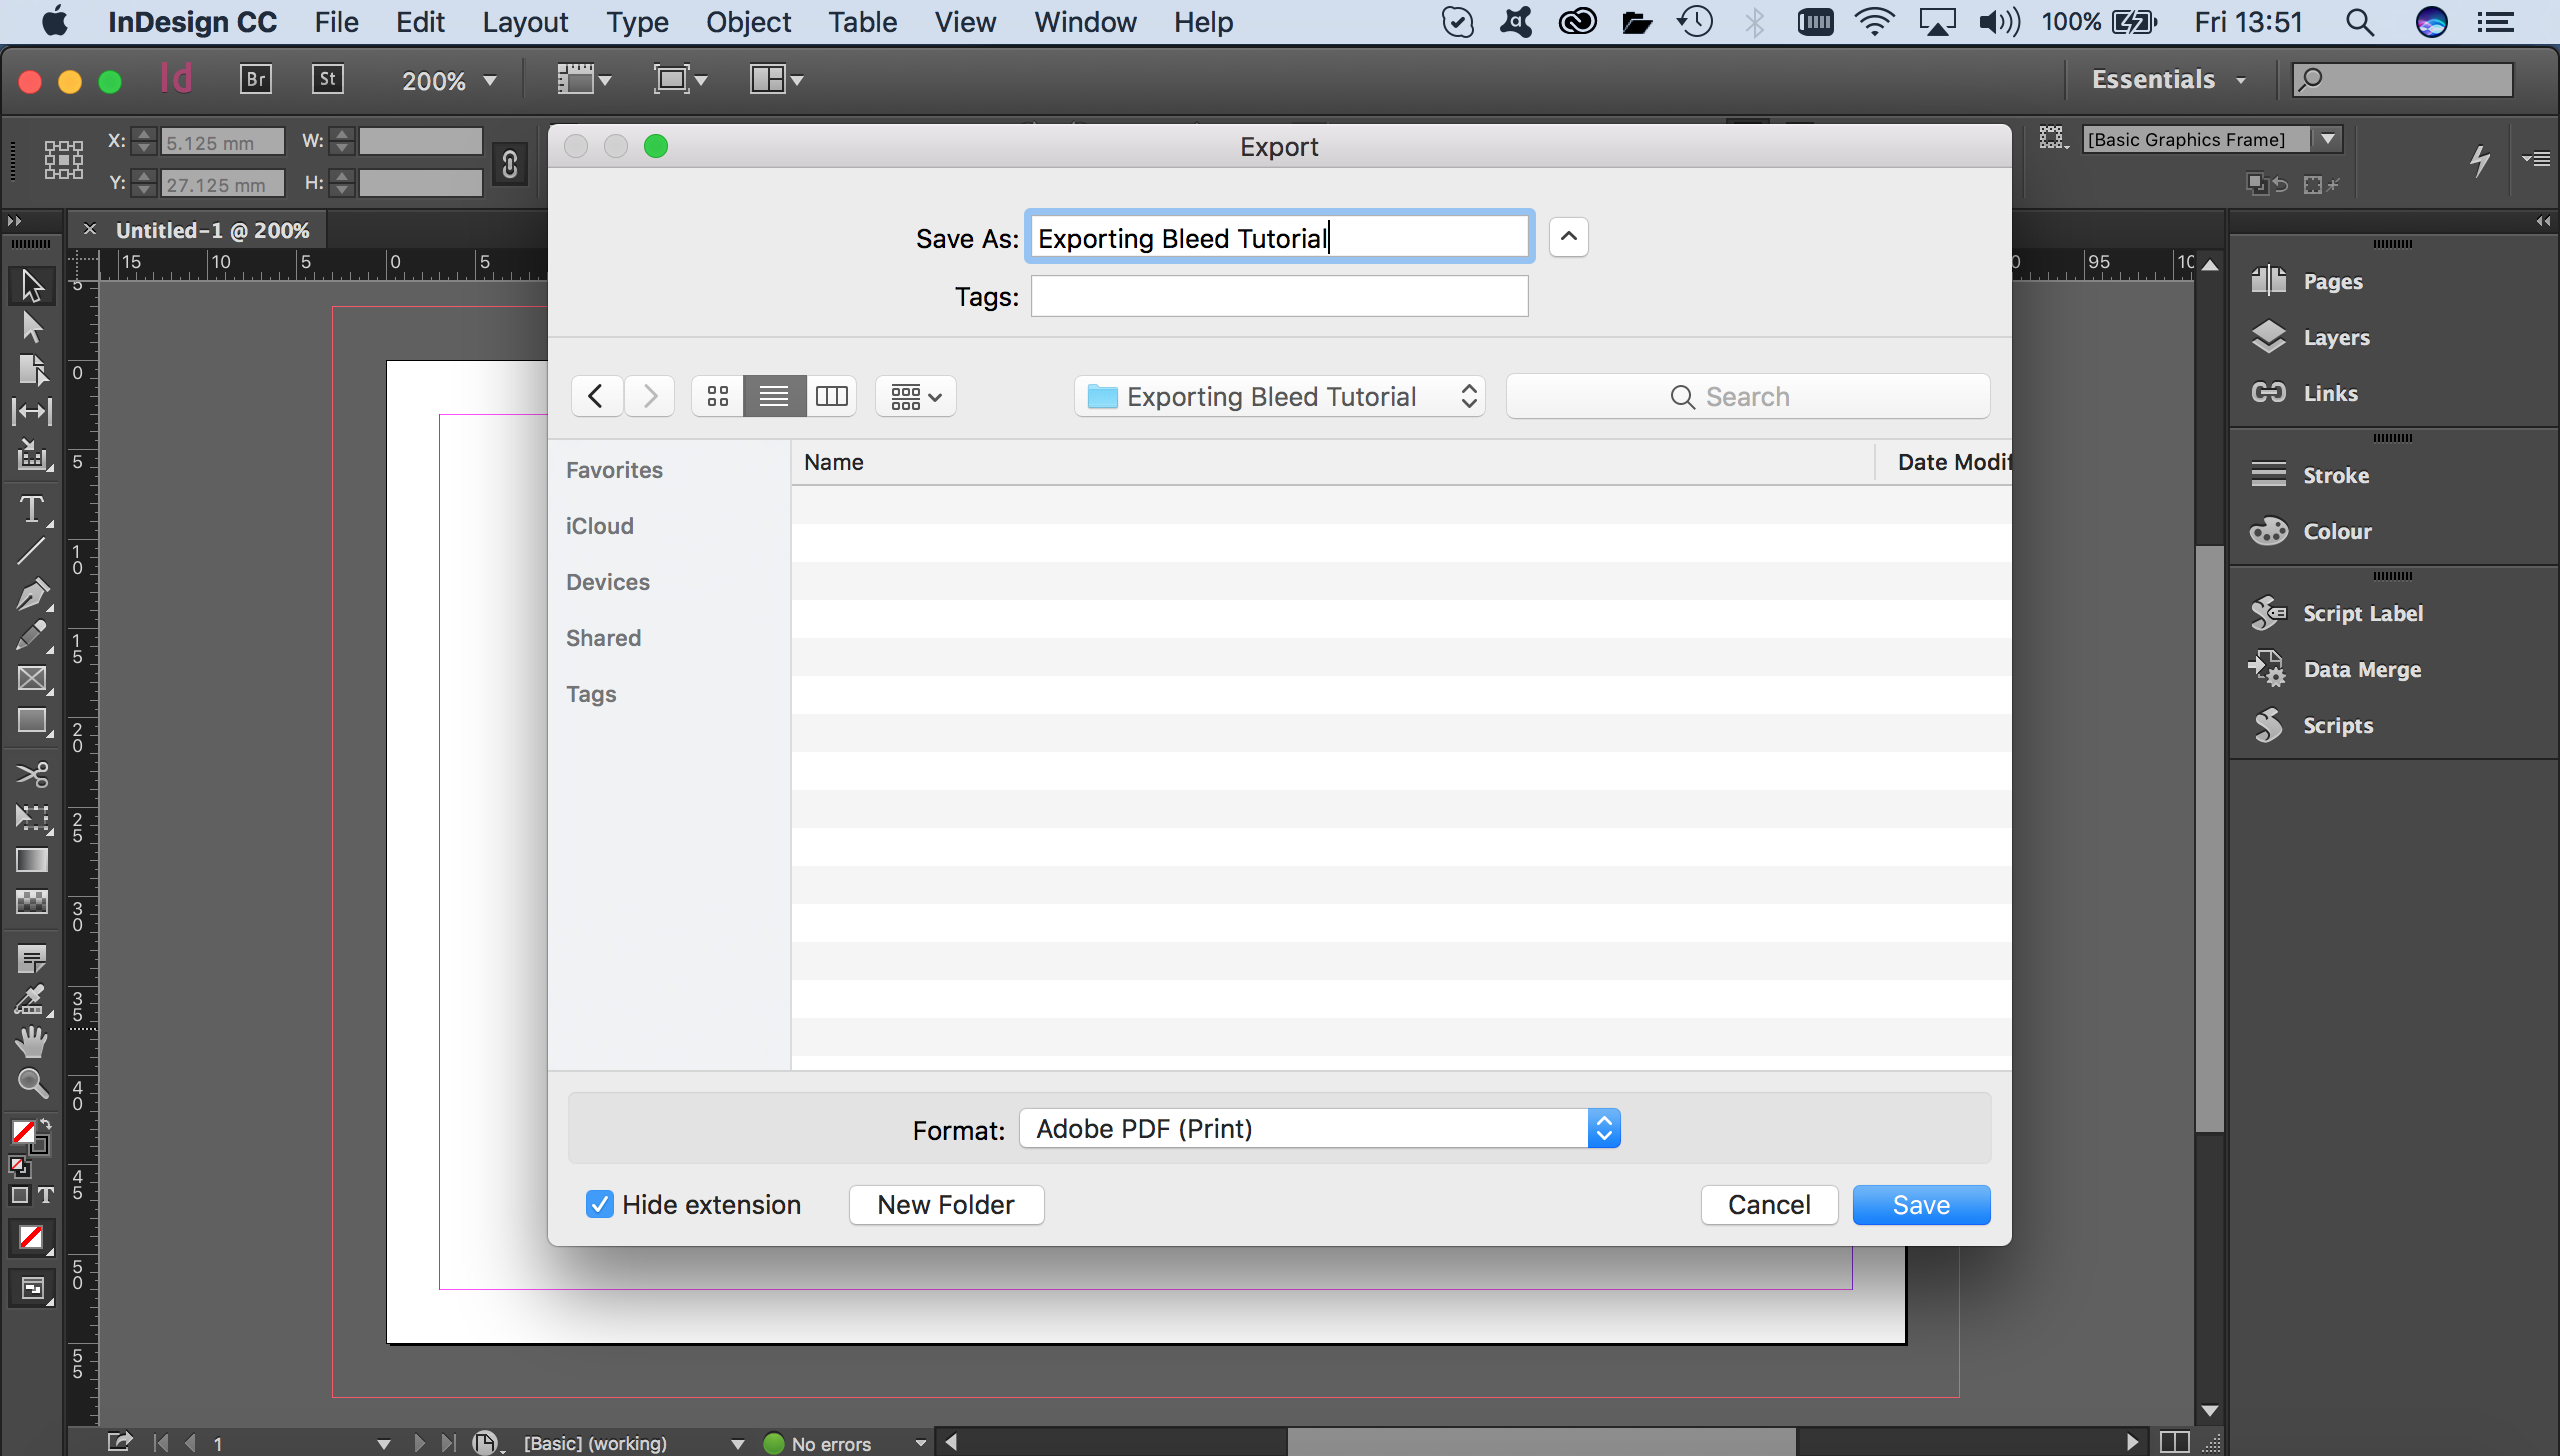
- Go to File and then Export or use shortcut ⌘+e to open the Export dialogue box.
- Choose your Save destination
- In the Export Adobe PDF dialogue pop up, click on the Marks and Bleeds section and check the Use Document Bleed and Settings checkbox is ticked and the bleed values are as you expect. You can manually add bleed at this time by unchecking the box and entering your own values. However it would be prudent to recheck your artwork to ensure print-readiness. If you are happy with the settings, click Export and the document InDesign document with save as a pdf to your chosen location.

Printer’s marks and bleeds
These days, printers generally don’t require marks on their artwork, as these are added later by the imposition software, when processing your artwork for print. Bleed however is one of those requirements that should not be overlooked by designers when creating their artwork. If you don’t know how to add bleed, this is relatively easy in many design programmes and we have outlined this above. However adding bleed in powerpoint or even photoshop isn’t just as straight forward and we’ve added our “how to”for both of these below.
Adding bleed in Adobe Photoshop
Although Adobe Photoshop doesn’t have the capability to add bleed in the same manner as InDesign or Illustrator, we can do this manually by adding 6mm to the width and the height of our document size. For example:
A business card which has a finished size of 85x55mm becomes 91x61mm and an A4 document which is finished size 210 x 297mm becomes 216 x 303mm “with bleed”.
The video below walks you through the process of adding bleed within Adobe Photoshop, setting up your margins manually using rulers and guides and how to export this in the correct format for printers.
The general rule of thumb for margins when setting up your designs in photoshop (when you have the correct bleed added), is that you keep your critical information more than 6mm from any edge.
Adding bleed in Adobe Illustrator
Adding bleed in Illustrator is relatively straight forward. As within InDesign it can be done at time of setting up your artwork or retrospectively at a later time by going to File > Document Set Up. Unlike InDesign, margins require manual set up by using guides. Bleed, regardless of which programme you use for design should always be set at 3mm, on all sides.
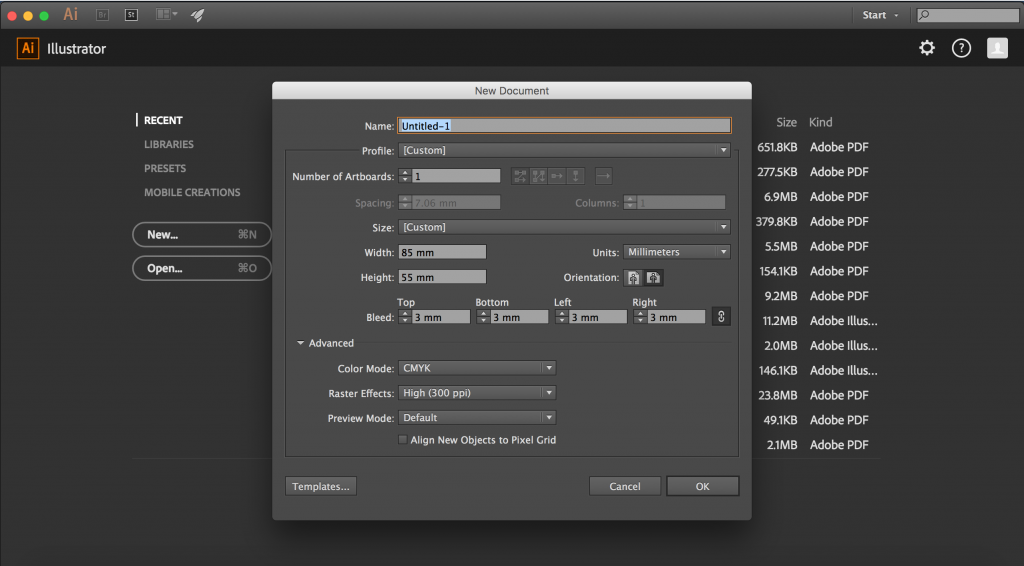

Color Mode – CMYK or RGB
When setting up your design for print, always use CMYK as your color mode. RGB is primarily for screen viewing whereas CMYK is the colour mode printers use. By starting your project off in the correct colour scheme, this will reduce any potential colour issues at time of print.
Conclusion
Many designers or those who aren’t designers but embarking on a design project find bleed a trouble to get their heads around. We hope you found this article useful and that content becomes the starting point for your designs. As your printing partner, we’re here to make things as easy as possible and so if you need a template within InDesign, Illustrator or Photoshop for any of the products we sell, just get in touch and we’d only be too happy to send one to you right away.